
A Comprehensive Guide to Dog Clicker Training for Beginners
Dog Clicker Training for Beginners: A Clear Way to Mark Good Choices
Dog clicker training for beginners gives you a simple way to tell your dog, "That exact choice earned a reward." The click marks the right moment, then a treat, toy, or other reward follows. It is useful when your timing matters, such as rewarding calm behavior at the door, a sit before greeting guests, or a loose leash check in on a stressful walk.
Here is the quick version:
- Get a clicker and small, easy to eat rewards.
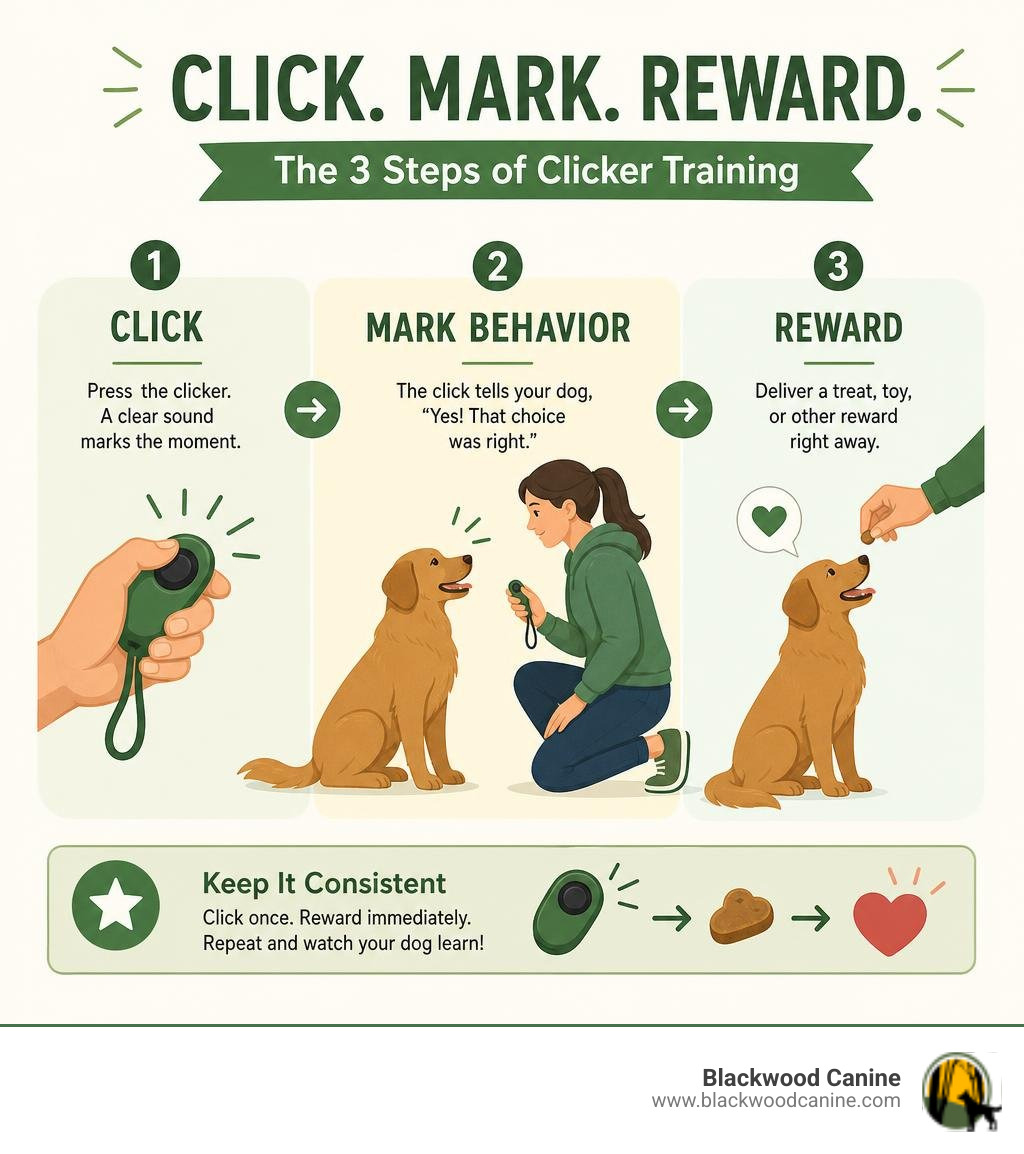
- Click once, then immediately give a reward 10 to 15 times so the sound predicts something good.
- Click the instant your dog does the behavior you want.
- Give a reward after every click.
- Keep practice short, clear, and low pressure.
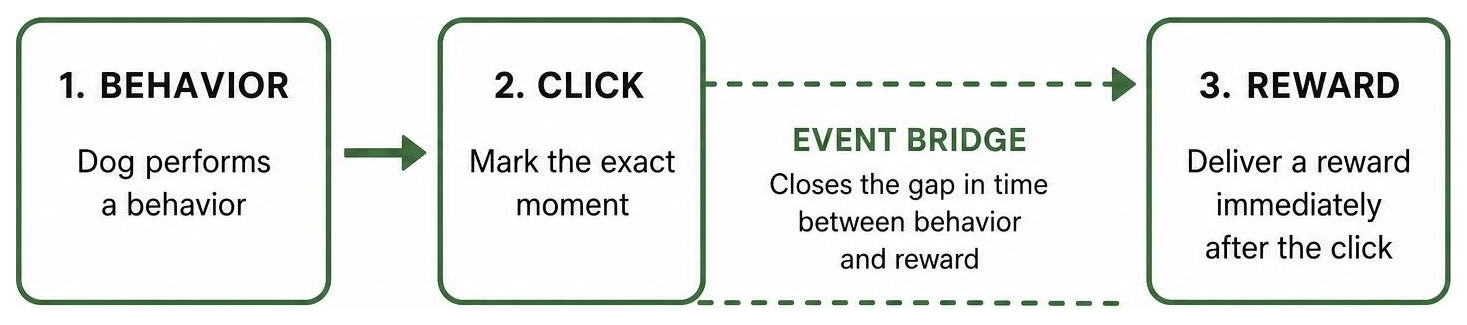
The click is not a command, a correction, or a way to get your dog's attention. It is a precise marker that bridges the gap between the behavior and the reward. That precision can make training less frustrating for owners in Portland, Vancouver, Scappoose, and nearby communities who are tired of repeated cues, tense walks, or embarrassing guest visits.
I am David Wright. After learning that many of my own early training habits were not helping my dog, I spent five years apprenticing under an experienced trainer and built my work around practical play and obedience skills, including dog clicker training for beginners.
What Is Clicker Training and How Does It Work?
At its core, clicker training is an event marking system. It relies on principles of operant conditioning, a scientific concept demonstrating that animals naturally repeat behaviors that lead to desirable outcomes. When your dog performs a clear action, you press a mechanical device that makes a sharp, distinct clicking sound. That click marks the exact millisecond the good choice happens.
In training terminology, the treat or play is a primary reinforcer because your dog inherently wants it. The clicker starts as a neutral sound, but once paired repeatedly with food, it becomes a secondary reinforcer or conditioned reinforcer. It acts as an event bridge between the moment your dog performs an action and the moment you hand over the reward.
While rewards build motivation, effective dog training involves more than treats alone. Real world reliability requires clear expectations, practical management, routine consistency, structured boundaries, and appropriate follow through. Marker training gives us the surgical precision needed to communicate those expectations without confusion.
For a deeper look into balanced marker frameworks, check out our guide on Dog Training Methods: Positive Reinforcement vs. Dominance Training.
The Science of Dog Clicker Training for Beginners
The scientific foundations of clicker training trace back to psychologist B.F. Skinner in the 1960s. Skinner showed how animals learn through consequences in controlled environments. Marine mammal trainers later adopted sound markers using whistles because handlers could not physically reach or correct a dolphin in open water. In the 1990s, dog trainers adapted these whistle techniques for house pets using hand held mechanical clickers.
Research and field studies show that roughly 80% of active handlers employ clicker tools or marker systems during foundational work. The reason is simple: reward prediction. When a dog hears the click, their brain recognizes that a reward is guaranteed. This turns training into an active problem solving game where your dog enthusiastically tries to figure out which movement triggers the marker.
Clickers vs. Verbal Praise and Treat-Only Methods
Many handlers ask why they should bother carrying a plastic tool when they can just say "Good boy!" or hand over a piece of meat.
The main issue with human speech is vocal variation. Our voices change in pitch, volume, and emotional tone depending on our mood, energy, or frustration. Furthermore, dogs hear us speak thousands of filler words every day that carry zero real consequences. A mechanical clicker makes the exact same neutral sound every single time.
Treat only methods without a marker also introduce a timing delay. If you reach into your pocket for a treat while your dog sits, your dog might stand up or step forward before the food touches their mouth. Without a marker, your dog thinks they got rewarded for standing up instead of sitting down. The clicker solves this by taking a mental snapshot of the correct moment.
According to a guide on How to Clicker Train Your Dog: Basics & Vet-Verified Guide — Dogster, secondary reinforcers allow handlers to communicate instant feedback across a room before a treat can be physically handed over.
Step-by-Step Dog Clicker Training for Beginners
Getting started with dog clicker training for beginners requires minimal gear and a structured plan. We want to set up our environment for quick wins before introducing complex commands.
Gear Setup and Treat Selection
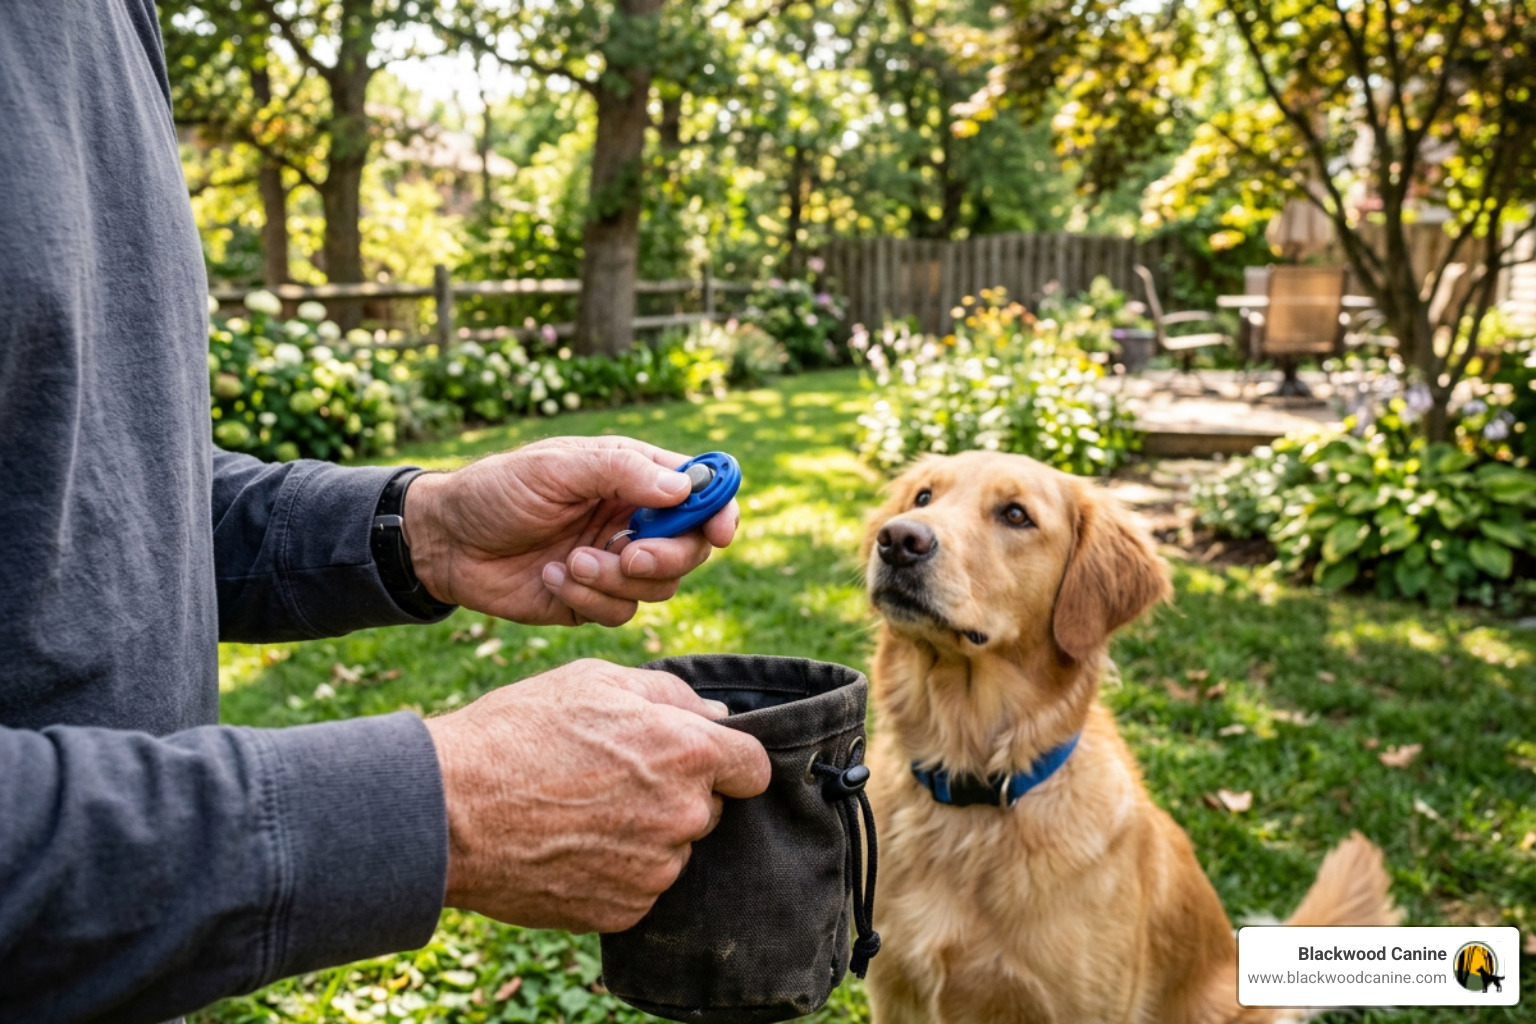
You do not need expensive equipment to start marker work. A full setup costs very little and includes three simple tools:
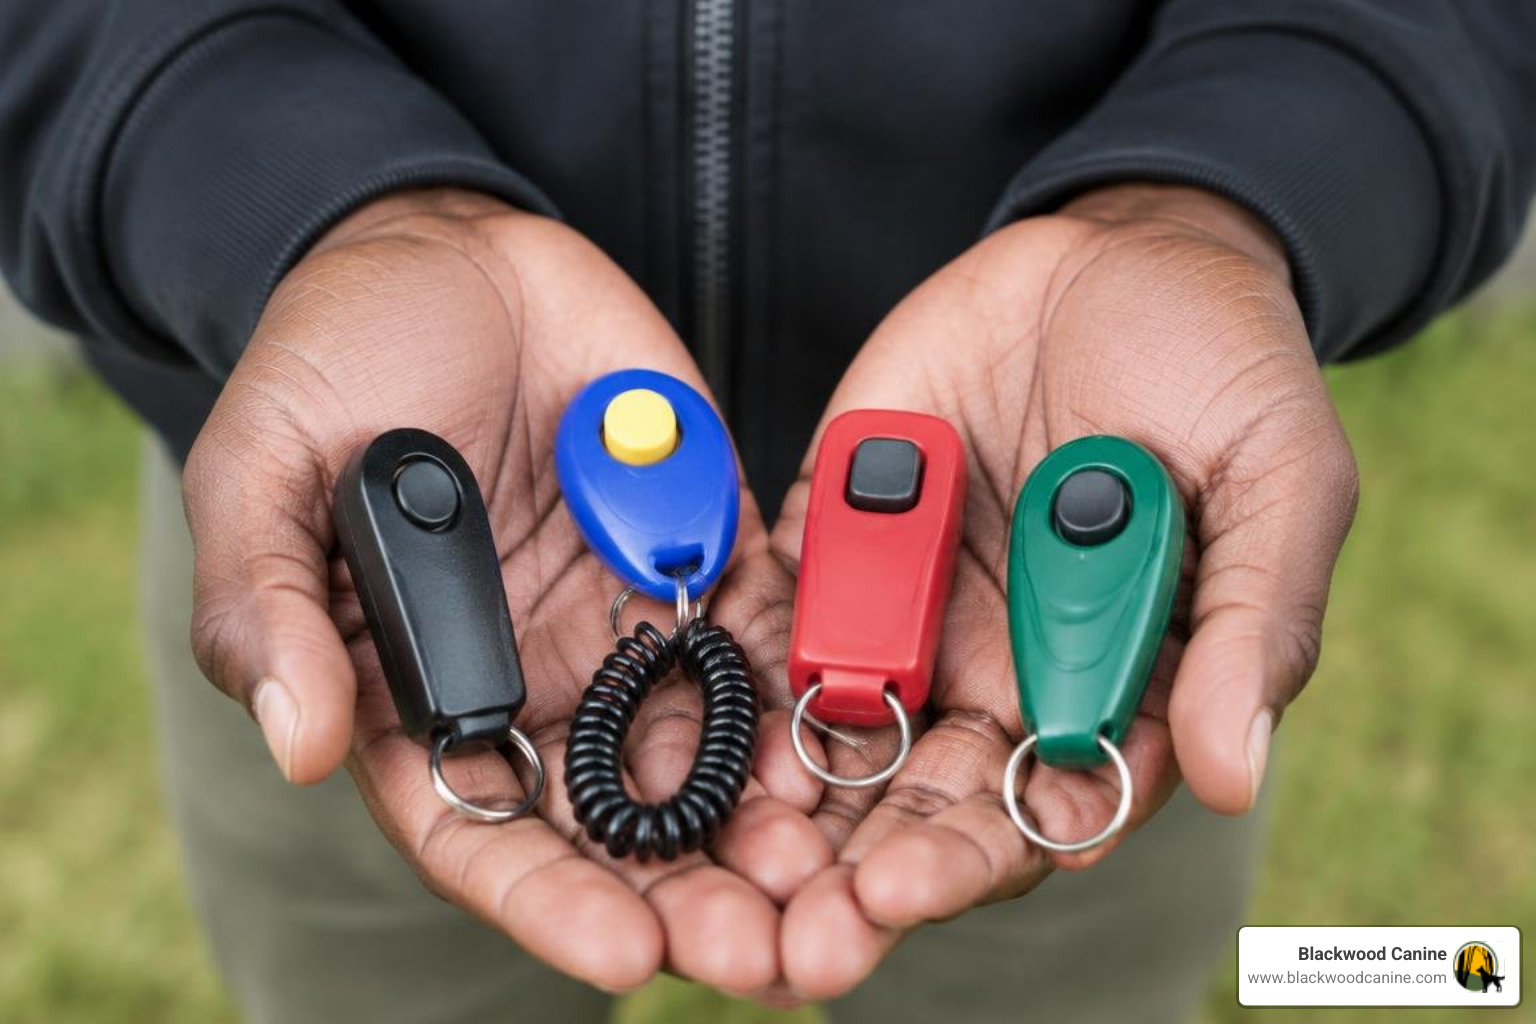
- The Clicker: Choose a standard box clicker for maximum clarity or an ergonomic button clicker with a wrist lanyard. Button clickers are slightly quieter, making them ideal for indoor practice.
- High Value Rewards: Use soft, pea sized treats like diced turkey sausage, cooked chicken breast, or commercial training bites. Small rewards allow your dog to swallow instantly without chewing, keeping the momentum going.
- A Treat Pouch: Clip a treat pouch to your waist so your hands remain free and your treat delivery is swift.
Using daily meal kibble works well for low distraction indoor practice, but higher distraction environments in places like Beaverton or Hillsboro require higher value options. For strategies on maximizing food drive, read our article on Dog Training Strategies: Building Engagement with Food.
How to Charge the Clicker in One Session
Before you can use the clicker to teach commands, you must teach your dog what the click sound actually means. This process is called "charging" or "loading" the clicker.
- Find a quiet, distraction free room inside your home.
- Hold the clicker in one hand at your side and keep treats ready in your pouch.
- Press the clicker once.
- Within one to two seconds, hand your dog a single treat.
- Pause for three seconds, then repeat the sequence.
Do not ask your dog to sit, lie down, or pay attention during this initial setup. Simply click and feed. Repeat this 10 to 15 times over a quick two minute session.
To test if your clicker is charged, wait until your dog is looking away or casually sniffing the floor. Press the clicker once. If your dog immediately whips their head around toward you expecting food, the sound has acquired its meaning. Most dogs make this connection within a single session, a process outlined in detail in Clicker Training for Dogs: A Complete Beginner's Guide - The Best of Breeds.
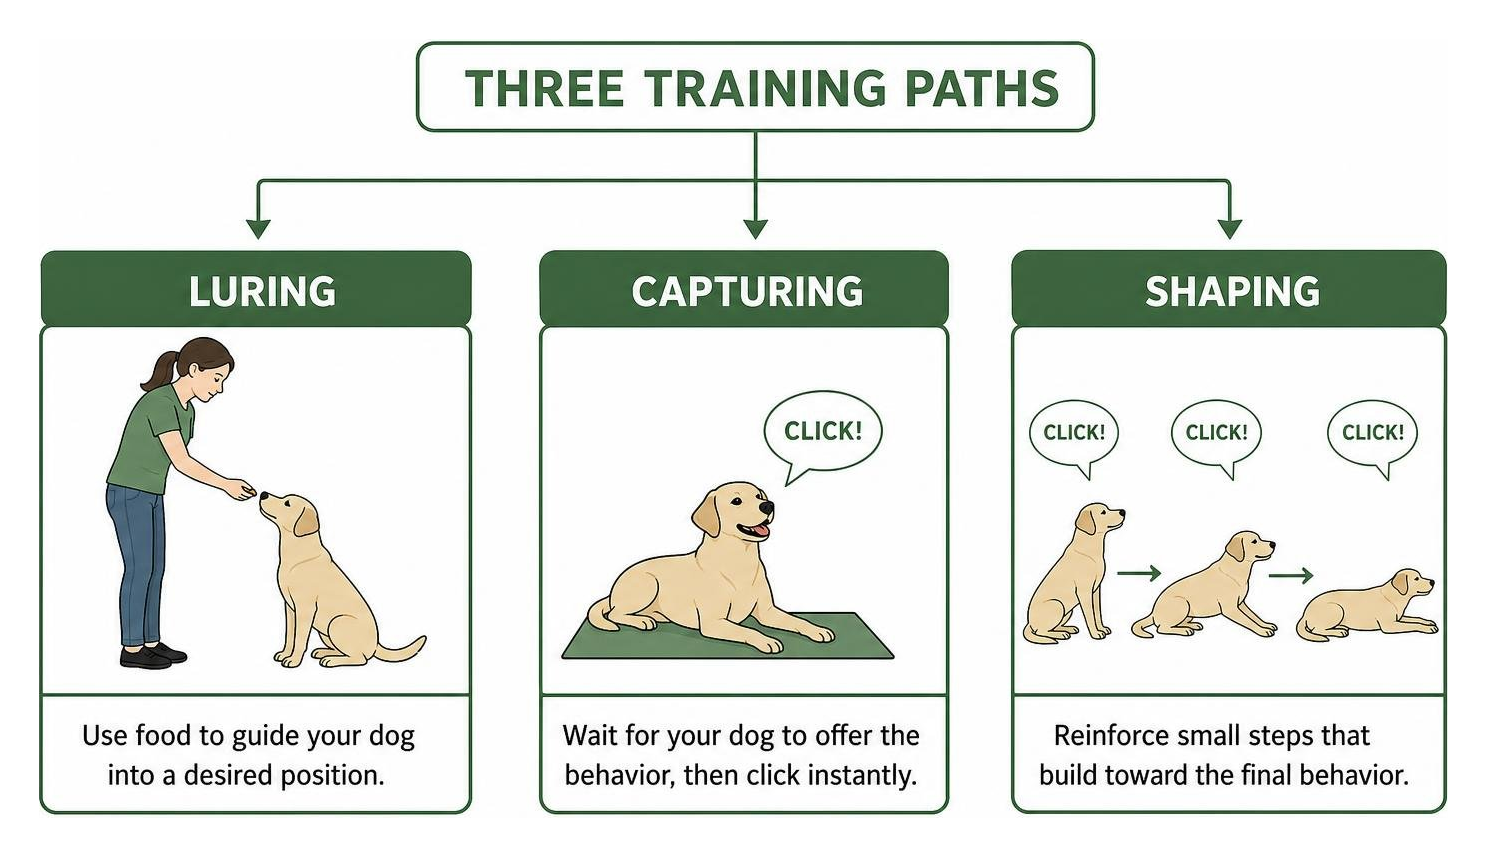
Core Training Techniques: Luring, Capturing, and Shaping
Once the marker is loaded, you can apply three primary techniques to teach physical movements:
- Luring: Using a piece of food held near your dog's nose to guide their body into a target posture like a sit or down.
- Capturing: Waiting quietly for your dog to naturally perform a desirable choice on their own (like lying down on a rug) and clicking the exact second it occurs.
- Shaping: Breaking a complex behavior down into tiny incremental steps, marking each small movement toward the final goal.
Teaching First Cues and Fading the Marker

Now that your dog understands the marker, you can begin teaching foundational obedience movements.
Teaching First Behaviors: Sit and Lie Down
Teaching a reliable sit is the easiest starting point for beginner handlers.
- Hold a small treat between your thumb and fingers right in front of your dog's nose.
- Slowly move your hand backward over your dog's head. As their nose tilts up to follow the food, their bottom will naturally touch the floor.
- The exact millisecond their rear end touches the ground, click once.
- Deliver the treat directly to their mouth.
To teach a lie down (or "drop"), start from a sitting position:
- Hold a treat at your dog's nose and move your hand straight down toward the floor between their front paws.
- Pull your hand slightly forward along the ground in an "L" shape.
- The instant their elbows and belly flatly touch the floor, click once and feed.
Do not say verbal cue words like "Sit" or "Down" initially. First, build the physical mechanics. Once your dog predictably follows the hand motion eight out of ten times, start saying the verbal cue one second before moving your hand. Step by step instructions for these introductory movements are also detailed in How to Clicker Train Your Dog: 8 Steps (with Pictures) - wikiHow.
Session Duration and Practice Frequency
Keep beginner practice sessions short and focused. Working for 3 to 5 minutes, two to three times per day, yields significantly better results than an overwhelming 30 minute marathon. Young puppies have brief attention spans, so 1 to 2 minute sessions work best for them.
Ending a session while your dog is still eager leaves them excited for the next practice round. Always follow training sessions with a fun game of tug or a short walk around your neighborhood in Scappoose or Warren to let your dog decompress.
Fading the Clicker and Food Rewards
The clicker is a teaching tool, not a permanent lifestyle crutch. You do not need to carry a clicker in your hand for the rest of your dog's life.
Once your dog performs a cue reliably across different environments, fade the clicker out and replace it with a simple verbal marker word like "Yes!" or standard verbal praise. Simultaneously transition from rewarding every single rep to an intermittent reinforcement schedule, rewarding every second, third, or fifth successful execution.
| Training Stage | Marker Tool Used | Reward Frequency | Practice Focus |
|---|---|---|---|
| Initial Learning | Mechanical Clicker | 100% (Every Rep) | Teaching new movement mechanics |
| Cue Association | Mechanical Clicker or Word | 100% (Every Rep) | Pairing verbal word with action |
| Generalization | Verbal Marker ("Yes!") | Intermittent (Variable) | Working near outdoor distractions |
| Mastered Behavior | Verbal Praise / Life Rewards | Periodic / Random | Maintaining daily lifestyle bounds |
For a comprehensive guide on transitioning off food lures, read Fading the Lure: How to Fade the Food Lure.
Overcoming Setup Challenges and Sound Sensitivity
While marker training is straightforward, handlers often run into physical setup mistakes or working hurdles.
Common Pitfalls in Dog Clicker Training for Beginners
Avoid these standard mistakes when starting out:
- Late Clicks: Clicking after your dog has already completed the movement and moved on to something else. Late clicks mark the wrong action.
- Pointing the Clicker: Do not point the clicker at your dog like a television remote control. Keep your hands naturally down at your sides.
- Clicking as a Recall: Never press the clicker to get your dog to look at you or come when called. The click is a marker, not an attention getter.
- Clicking Without Treating: Every click is an absolute promise of a reward. Even if you press the clicker by accident, deliver a treat anyway to preserve the integrity of the mark.
If you struggle with mechanical clicker timing, try practicing without your dog first. Drop a tennis ball onto a hard floor and practice clicking the exact instant the ball impacts the surface, a exercise highlighted in Clicker Training for Dogs: Beginner Guide.
Managing Sound-Sensitive Dogs and Verbal Alternatives
Some dogs, especially rescue animals or sensitive breeds, may flinch at the metallic snap of a traditional box clicker. If your dog backs away or shows signs of fear:
- Muffle the clicker by wrapping a layer of duct tape over the metal tongue.
- Operate the clicker inside your coat pocket or behind your back to dull the sound volume.
- Use a soft clicking alternative, such as pressing the top button of a standard ballpoint pen.
If your dog remains uncomfortable with mechanical noises, drop the clicker entirely and use a crisp, single syllable verbal marker like "Yes!" spoken in a neutral tone. Additional safety guidelines for young dogs can be found at Puppy Clicker Training Step-by-Step Guide | Purina US.
Frequently Asked Questions About Beginner Clicker Training
At What Age Can I Start Clicker Training My Puppy?
You can start clicker training a puppy as early as eight weeks old, as soon as they arrive at your home. Keep sessions limited to 60 to 90 seconds, use soft, moist treats, and keep all mechanical interactions light and positive. Early foundational work builds focus that pays off throughout adulthood.
Must Every Click Always Be Followed by a Treat?
Yes. To maintain the psychological power of the marker, every click must guarantee a reward. If you click, you feed. If you accidentally click when your dog jumps up or does something incorrect, feed them anyway, then adjust your physical timing on the next repetition.
What Should I Do If My Dog Does Not Respond to the Clicker?
If your dog ignores the clicker sound, evaluate three main factors:
- Hunger Drive: Practice right before regular mealtimes rather than directly after your dog has consumed a full bowl of food.
- Reward Value: Low value dry biscuits may not hold your dog's interest. Upgrade to high value options like freeze dried liver, hot dogs, or real chicken.
- Distraction Level: Move your practice from a busy yard in Bethany or Portland to a quiet indoor hallway with zero competing environmental distractions.
If your dog continues to display severe disinterest, persistent anxiety, or sudden behavioral shifts, consult a qualified veterinarian to rule out underlying joint discomfort or medical conditions.
Start Building Clear Communication With Your Dog
Mastering dog clicker training for beginners provides a direct line of communication between you and your dog. By marking exact moments of good choices, you reduce confusion, speed up learning, and make daily obedience practice enjoyable for both ends of the leash.
However, marker precision is only one piece of a successful long term training plan. Lasting obedience requires real world management, consistent house rules, structured boundaries, and clear follow through.
If you live in Scappoose, St. Helens, Warren, Bethany, Hillsboro, Beaverton, Portland, or Vancouver and feel frustrated or stuck with your dog's behavior, you do not have to figure it out alone.
At Blackwood Canine, our foundational basic obedience training starts at 4 weeks, establishing clear communication and practical control. For complex behavioral concerns or reactive habits, we utilize comprehensive 6 week and 8 plus week training timelines to build reliable real world manners. We do not offer training programs shorter than 4 weeks because real behavior change takes time, practice, and consistency.
To read more about our foundational approach, explore Curious About Clicker Training? Dog Trainers Explain the Basics.
Ready to get a clear, step by step roadmap tailored specifically to your household? Reach out to us today to set up your Good Dog Game Plan and build a calm, reliable relationship with your dog.